This Power Automate workflow is tied to one of my favorite solutions end-to-end solutions. Although there is a premium connector that will convert a Word docx file to PDF, sometimes you don’t want to pay the premium when there is another solution. This one requires the use of OneDrive.
Description of the workflow
When the Status of a docx file in a Teams-connected SharePoint site is set to Final, create a PDF of the file and copy the PDF to a Communication site.
Workflow Steps
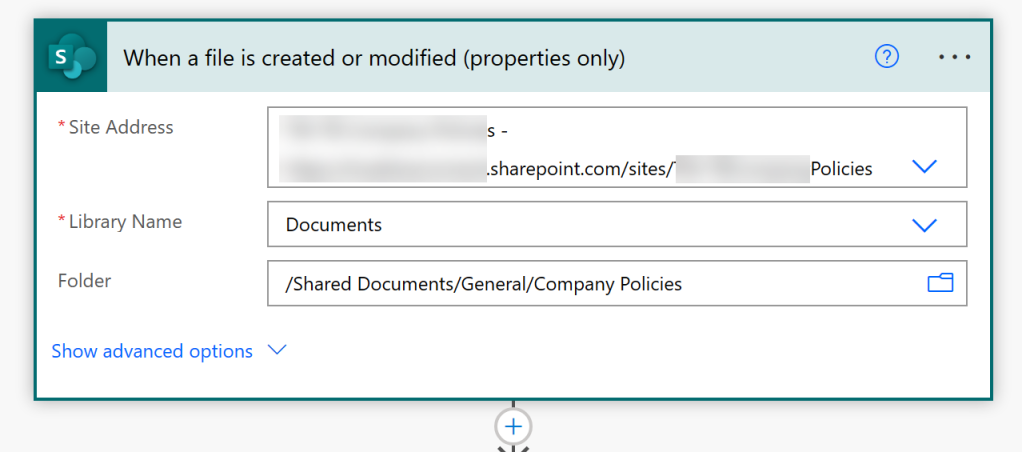
Create a New Workflow with the trigger action being When a file is created or modified (properties only)
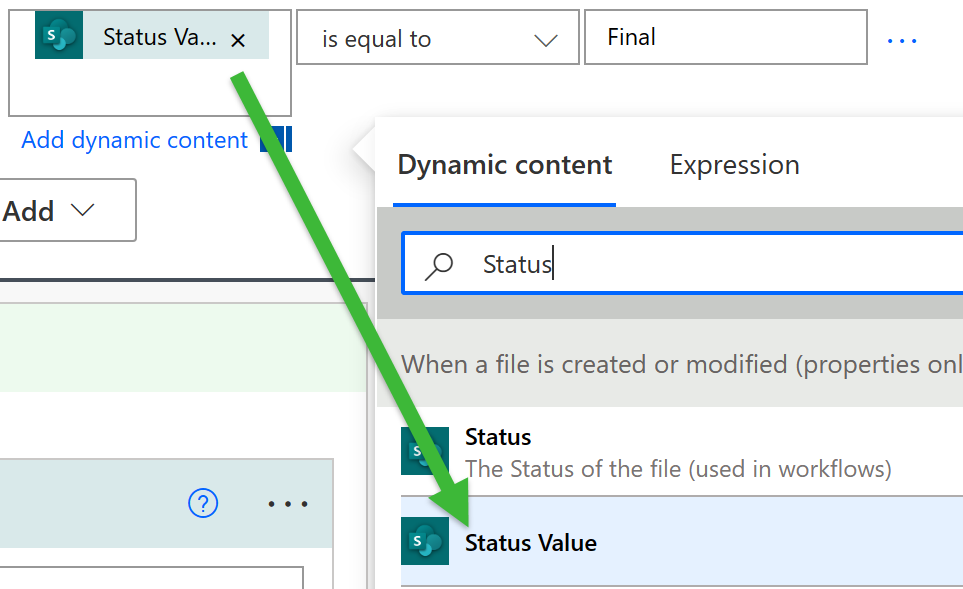
Add a Condition step to check if your File name ends with .docx and if the Status Value is equal to Final. Add two conditions:
- File name with extension ends with .docx.
- Status Value equals Final.
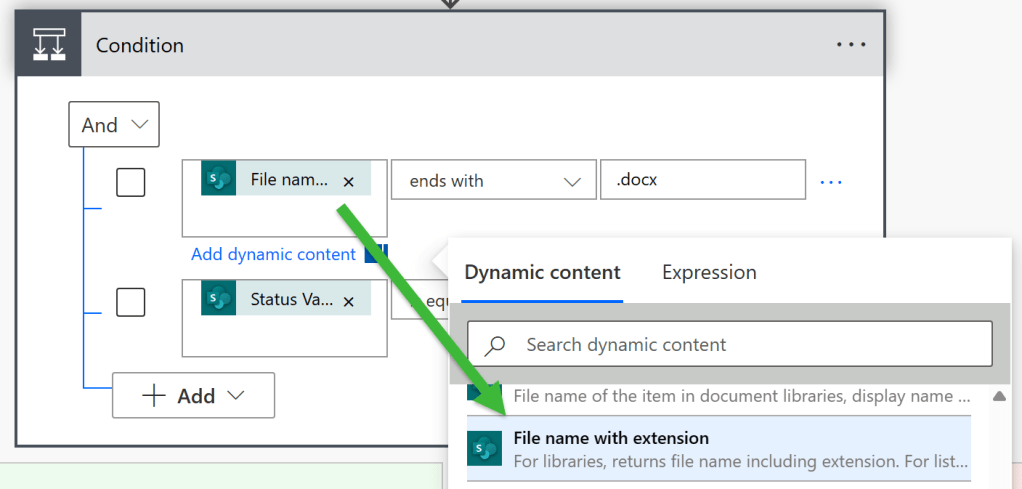
Note: It is important to choose Status Value as opposed to just the Status field.
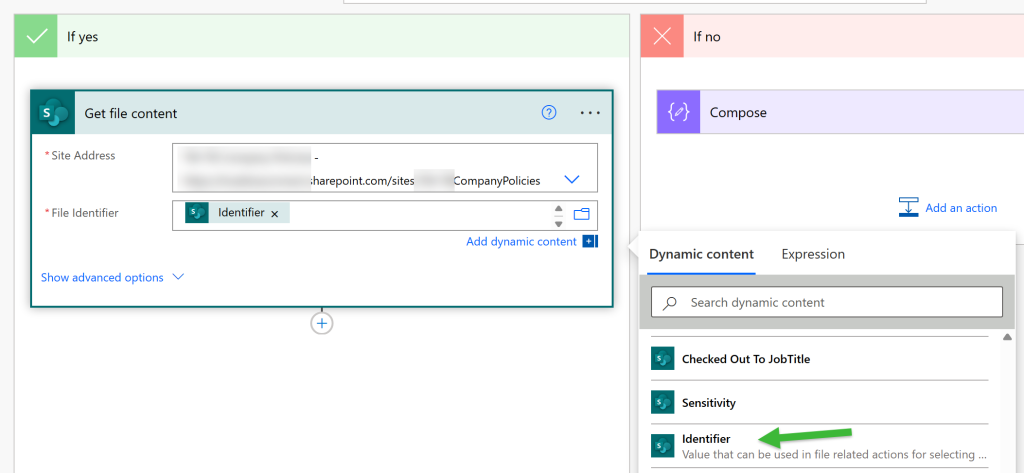
When you add the Condition step, two branches will be inserted into your flow If yes and If no.
In the If yes branch add a new step to Get file content. Choose the source library address. Set the File Identifier field to be the Identifier field from the When file is created or modified trigger.
For the next step you will use the OneDrive Create file action.
Select your Folder Path. Set the File Name to the File name with extension from the When file is created or modified trigger.
For the File Content, choose the File Content field from the prior Get file content step.

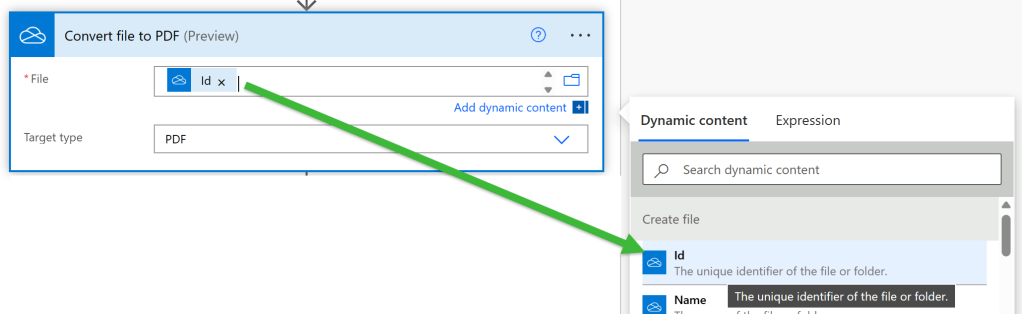
The next step is to Convert file to PDF. Choose the Id from the Create file step and verify that Target type is PDF.
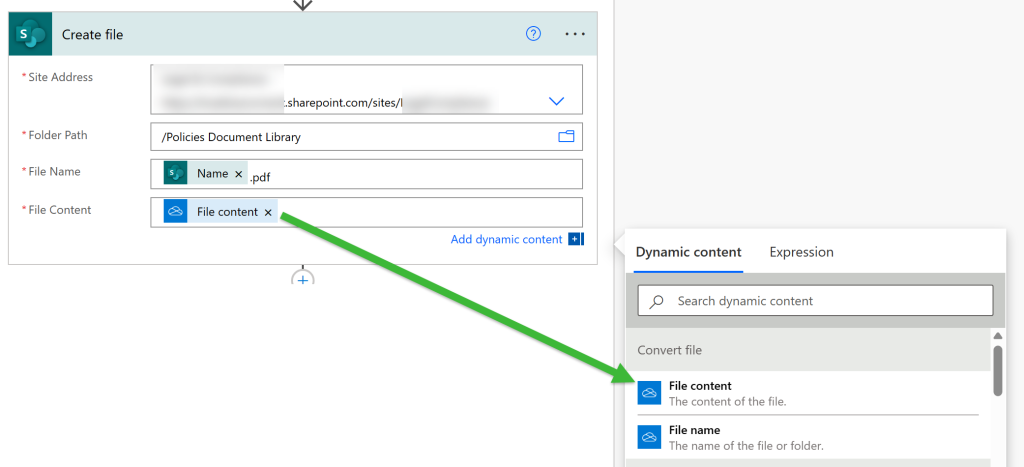
The next step is to Create file in the target library. Choose your target Site Address and Folder Path. For the File Name use the Name field from the initial When a file is created or modified (properties only) trigger, then add .pdf to the end to generate a PDF file.
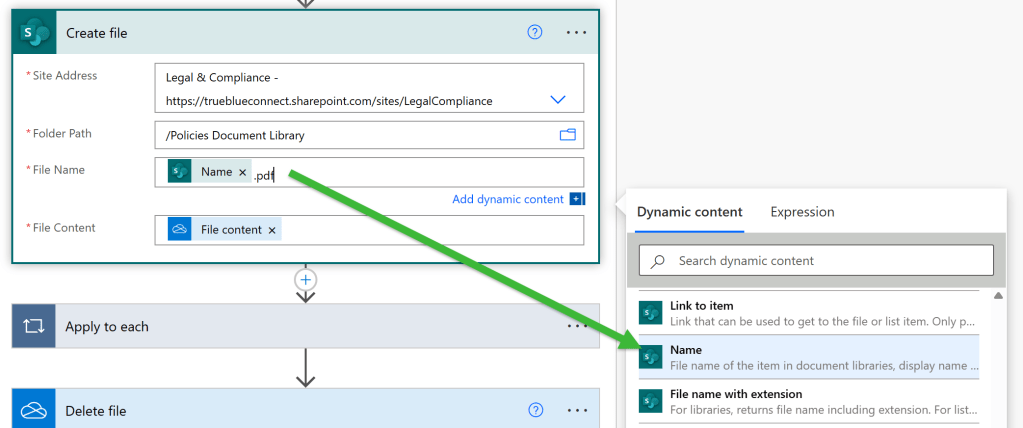
Make sure to use the File content from the Convert file step.
One of the keys to the success of this publishing solution is that the files have several properties that are used to generate dynamic web pages using library filters. This step updates the newly created file with the properties from the original .docx file.
Because some of the properties have a multi-value picklist in my solution, the step is wrapped in an Apply to each step. If you don’t have multiple values in your properties, you won’t have the Apply to each wrapper.
Add a step to Update file properties. Choose the values for each of the properties from the original .docx file that triggered the workflow.
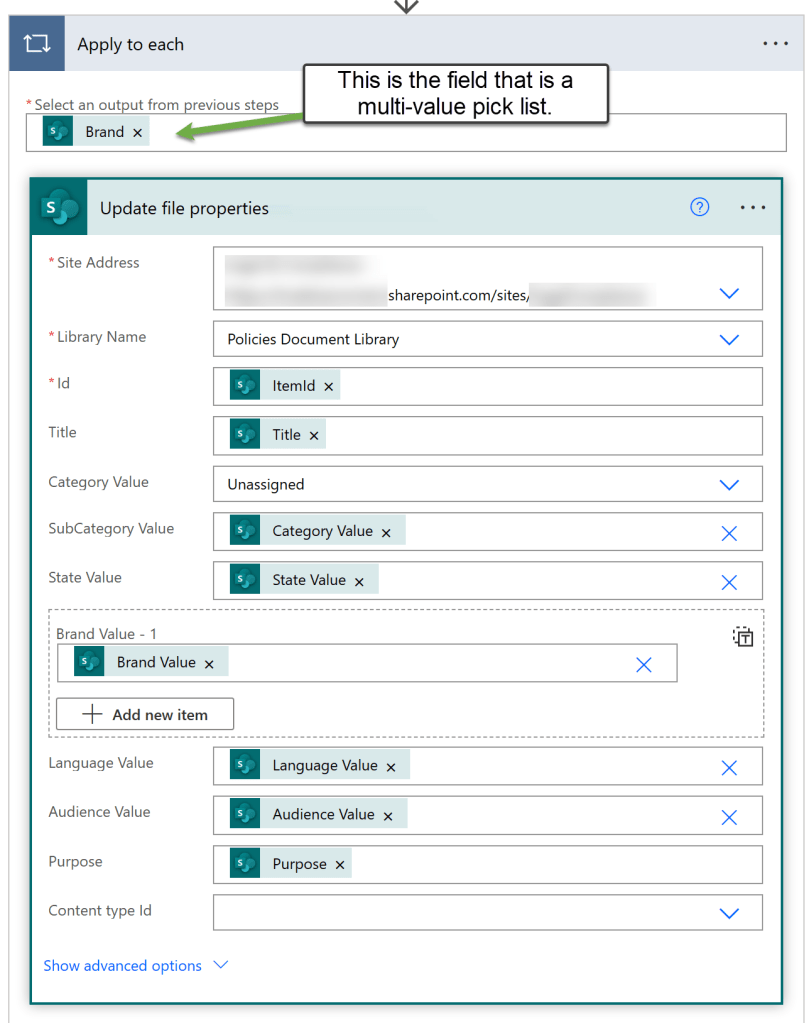
Note for each of the properties in the library that are choice columns the field you want to insert from the Dynamic content choices are the <Property name> Value.
Cleaning up – Delete the OneDrive file
Because you created the file in OneDrive only to generate the final PDF version, you can delete that file.
Choose the OneDrive Delete file action and use the Id from the Create file in OneDrive step.

The final step is to update the properties for the original source file so that your workflow doesn’t run again.
Add the Update file properties step and update the Status Value to Published.


Leave a comment